Configure RADIUS authentication for Wi-Fi
Remote Authentication Dial In User Service or “RADIUS” associates with a client, such as a wireless access point, authenticating and authorizing users attempting to access the network. The primary reason one would want Wi-Fi users to connect to the network would be to improve security. As opposed to having a single Wi-Fi password for authentication, RADIUS uses a username and password combination to authenticate a specific user with the active directory. This way it minimizes the need to update the Wi-Fi password at regular intervals. Another advantage is when we want to restrict Wi-Fi access to specific groups for instance “Managers”, we can simply create a security group in Active Directory, add all the managers to the group and allow only the group to authenticate via Wi-Fi. Let’s configure RADIUS authentication for Wi-Fi but first make sure you have the prerequisites covered.
Prerequisites
- AD CS role installed
- NPAS role installed
- Have an existing group that can be assigned during NPAS configuration
- Have a Wi-Fi router with WPA Enterprise authentication feature
If you have met all the prerequisites, click here to jump to configuring NPAS. Our environment is running on Windows Server 2016, the instructions should also work for windows server 2012.
Installing AD CS role
To install AD CS role. Open “Server Manager”, click on “Add Roles and Features”. Click “Next” until you reach “Server Roles”. Now select “Active Directory Certificate Services” and click on “Add Features”. On the “Features” window, leave everything to default and click next until you reach confirmation window. Clicking “Install”, will install AD CS server role.
Configuring AD CS
Once the installation is complete. You should see the following screen
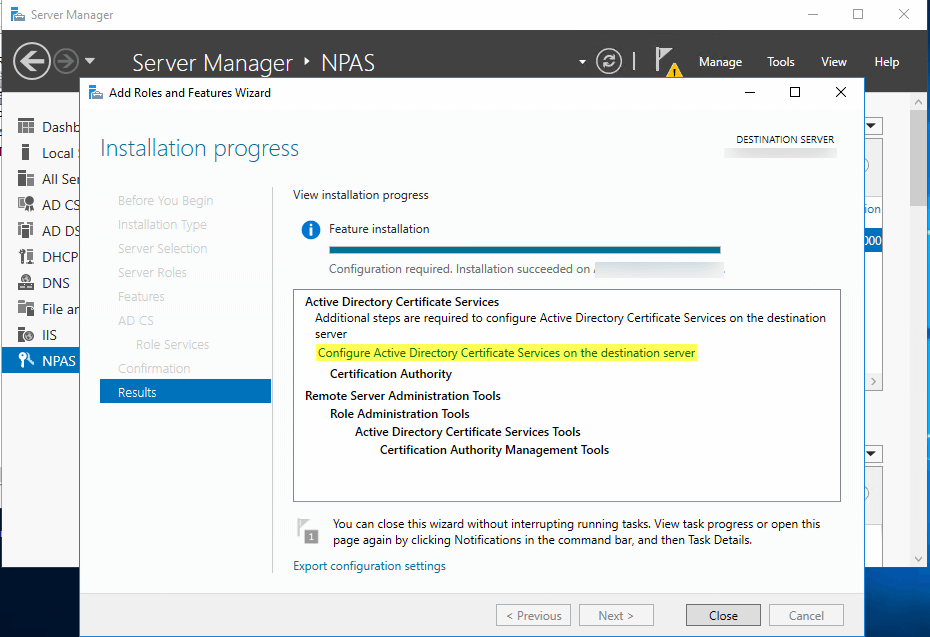
Click on the highlighted text to start configuring AD CS.
Make sure you are a member of Enterprise Admins or Local Administrator groups. Since, we are on an active directory environment, the user should be a member of enterprise admins to continue with the configuration. “Certification Authority” is selected by default if not select it and move to Setup Type. Here select “Enterprise CA” and in CA type select “Root CA”.
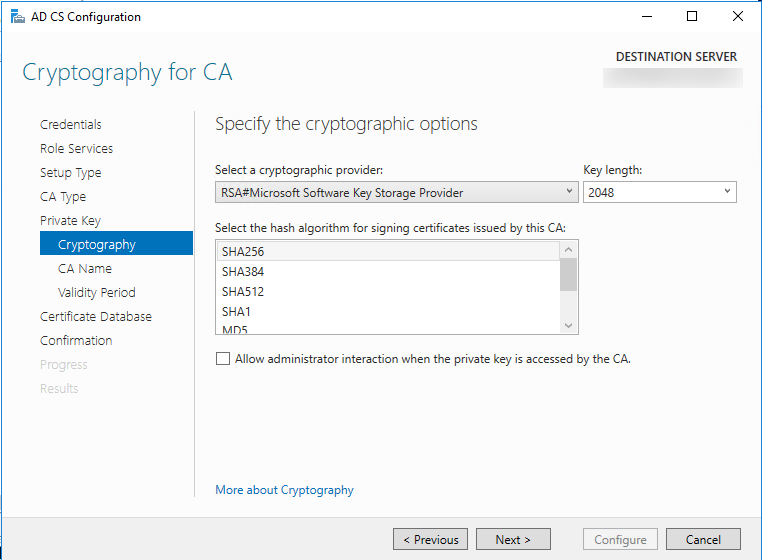
Create a new “Private Key”. Make sure SHA256 is selected as the hash algorithm and key length should be 2048
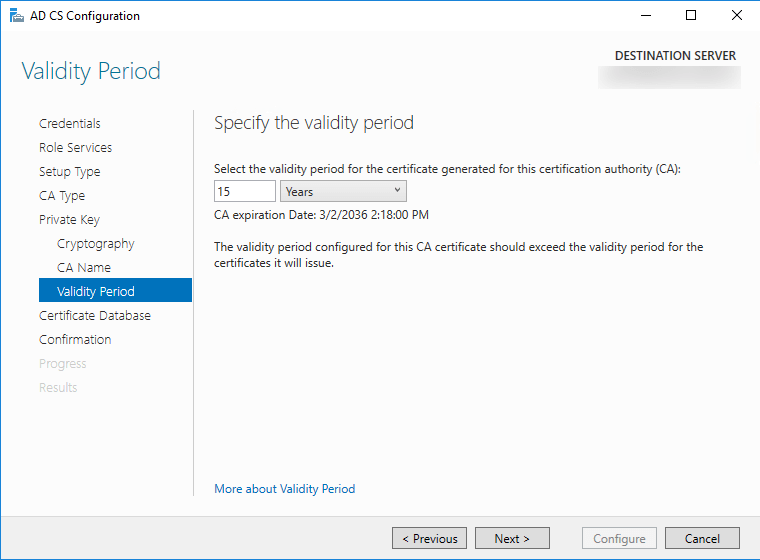
Select a validity period. I chose 15 years.
I would advise to keep everything to default after you have set the “Validity Period“. Once the “configure” button is enabled clicking it should complete the configuration.
Installing NPAS role
To install NPAS server role, follow the same steps (here) that you followed while installing AD CS server role. Instead of AD CS simply select NPAS and continue with everything as default. This will install the NPAS server role. Once the installation completes, click on “Configure NPAS” to start with the configuration process.
Configuring NPAS
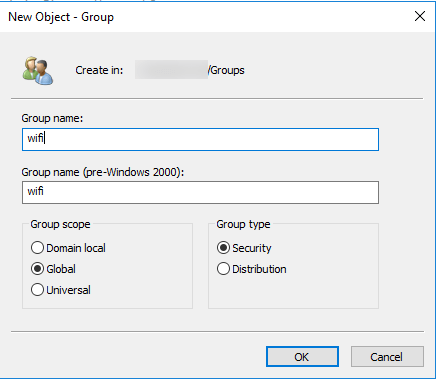
Optional step: Before starting the configuration create a group called “wifi” (if you want to follow along), any group is fine. I have created the group to allow Wi-Fi access to only a few people. To create a group open “Active Directory Users and Computers“, right click on “Groups” > New > Group. Group scope should be global and group type should be security. Refer to the following screen capture.
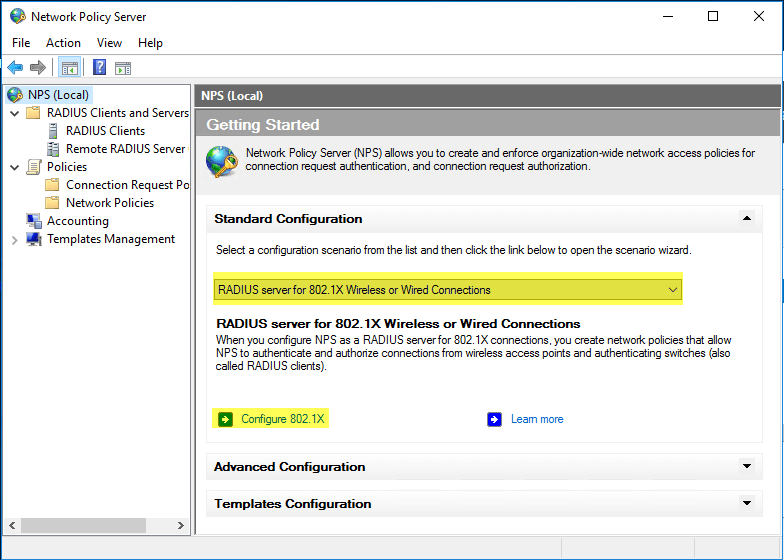
To start configuring NPAS. Open “Server Manager”, click on “Tool” and select “Network Policy Server”. This will open the NPS window. Select “RADIUS server for 802.1X Wireless or Wired Connections” from the dropdown menu and click “Configure 802.1X“
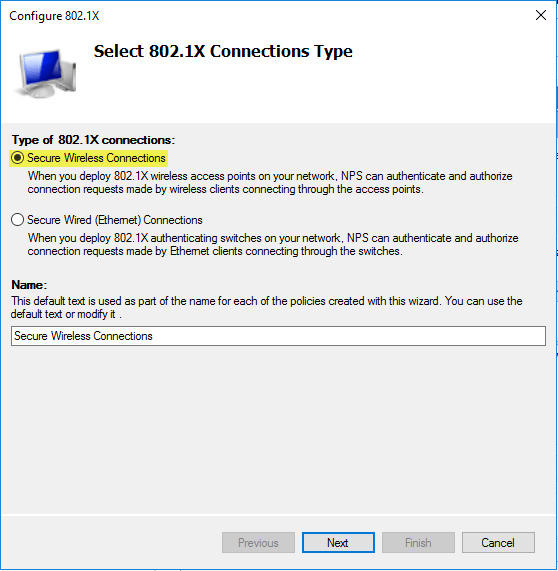
On the following screen select “Secure Wireless Connections” and give it name. Click next.
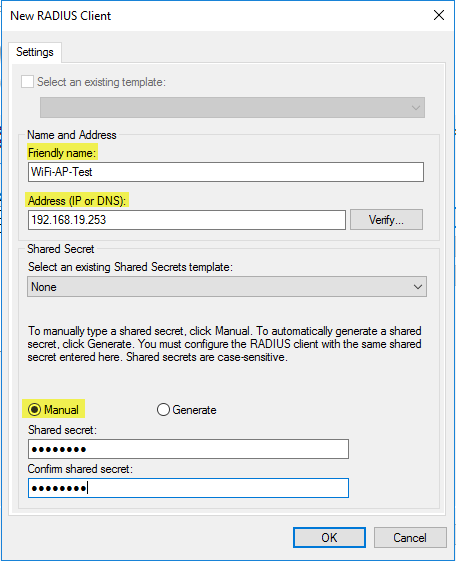
On the “Specify 802.1X Switches” windows click “Add” to add a new Radius client. Here, type in a friendly name and enter the IP address of the Wi-Fi router. Click on “Manual” and enter your desired shared secret and click ok.
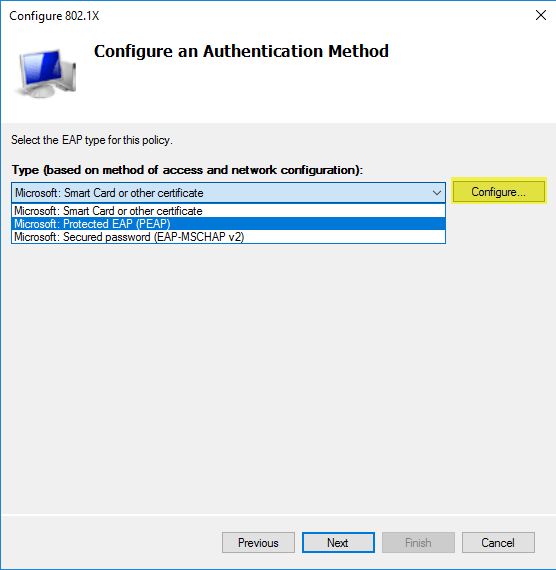
Select the RADIUS client you just added and click next. On the “Configure an Authentication Method“, select “Microsoft: Protected EAP (PEAP)” from the drop down and click next.
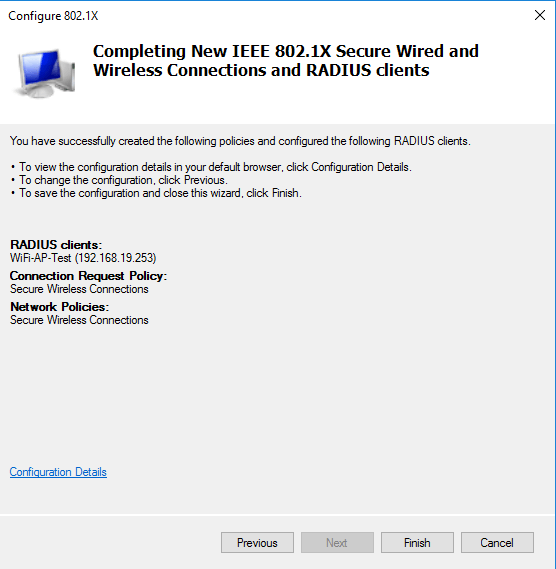
Now we have the “Specify User Group” window, here you will have to add the group that we created earlier. A group should be specified, otherwise it will allow every domain member to connect to the wireless AP. On the “Configure Traffic Control” keep everything to default and click next. You should see the following screen after, click finish to complete the configuration process.
Configuring Wi-Fi router with WPA Enterprise authentication
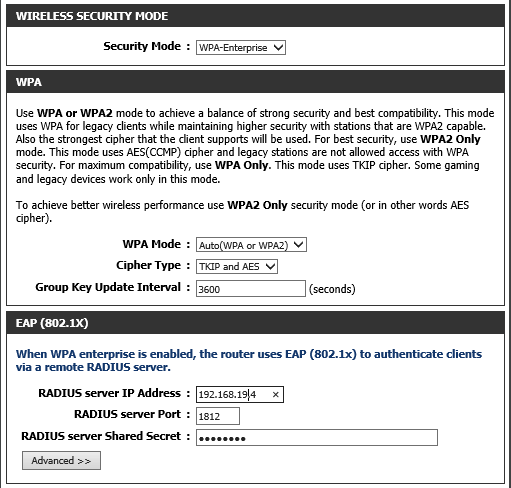
This is the simples part, connect to your Wi-Fi router via web GUI and locate Wireless Security settings. Select “WPA-Enterprise” as the security mode. Enter the RADIUS server IP address (the server where NPAS role is installed), keep the RADIUS server port to the default 1812 and enter the shared secret.
That is it, we are done configuring RADIUS authentication for Wi-Fi users. Click on the SSID, enter your username and password. DONE!
If you have any questions leave a comment down below. If you liked this post, here is more.
Taking bookstack DB backup in docker
Installing and Configuring a TFTP Server
Convert .vhdx file to .vhd file
About The Author
Redwan
Just your average IT guy talking about IT stuff.